Setting a Thumbnail Picture

|
Archived Page This article has outdated information. It is now archived, only kept for historical purposes. Generally, outdated articles write about how to use or interact with the Roblox website. The services and features as written at the time have been changed or removed by Roblox Corporation. External links may be substituted with a Wayback Machine or Roblox Forum Archive link. |
Place Thumbnails
Setting your place's thumbnail pictures is an important task in ROBLOX to make people come visit your place. The steps to follow are simple.
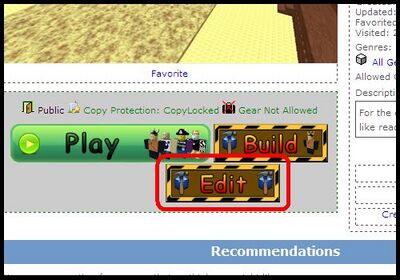
To begin, we are going to start out in ROBLOX Studio mode. To find this, go to your Start Menu > All Programs > ROBLOX > ROBLOX Studio. Once the program loads, you'll see the ROBLOX browser is on the Games page. Navigate to your place just like you would on the normal site. When you get there, you'll see three buttons below your place image. One will say "Play", the next will say "Build", and the final one will say "Edit." For now, we want to use Edit mode, so go ahead and click on that third button.
Your stage will load and you'll be able to move around the stage with a free camera. At this point, you'll want to align your camera in such a way so that the stage looks visually appealing. Here are a few tips to make a good looking place image:
- Place emphasis on areas of your map that have a lot of detail. Many times, making it look like you spent a great deal of time on your place can make people want to visit.
- Get as much of your stage as possible in the shot. People like larger maps, because they're more fun to explore. If you show a lot of your map, people will want to visit and see what else is there.
- Don't make your picture entirely a shot of a decal. Although this can sometimes be effective, users will prefer to see an elaborately built stage than an elaborately drawn decal. A good technique to use is to make a transparent brick with a partially transparent decal so that the potential visitor can view the stage and see some additional information on your decal.
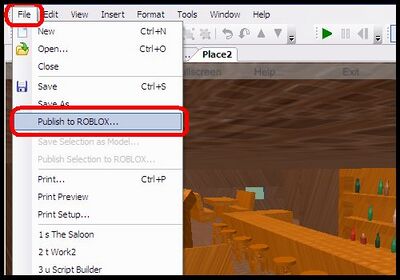
Once you choose the desired camera angle, you'll have to save your place. To do this, go to File > Publish to ROBLOX... The following form will show up.
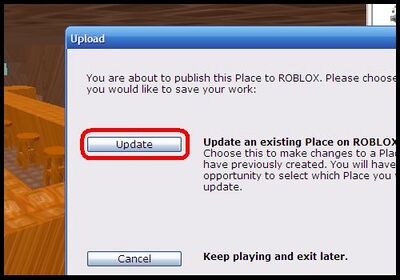
When this happens, you simply have to click Upload to continue. Click cancel if you want to go back and tweak your camera angle some more.
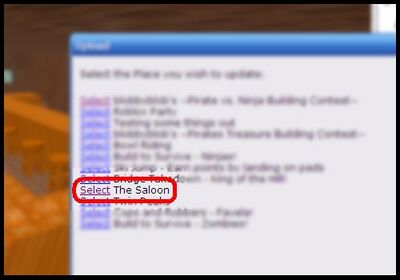
Once you click Upload, you'll be directed to a form that has a list of all of your stages on it. Pick which stage you wish to write over by clicking on the text.
Tips
- Make sure your thumbnail shows as much detail as possible, this way people would be more prompt to visit you place.
Model Thumbnails
Setting a model's thumbnail is done in a similar manner. It's important if you're interested in getting many people to take and/or favorite your model. Go through the following steps to upload your model with a desired thumbnail picture.
Before you begin, though, you have to position your camera in a way that makes your model appealing. The same tips apply for models as for places.
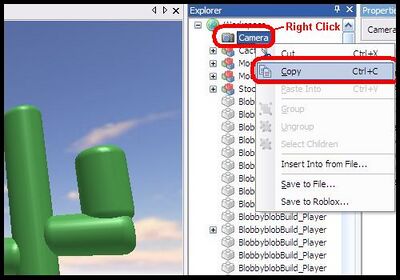
The first step would be to get a copy of your camera in the designated alignment. To do this, right click on the camera and select "Copy."
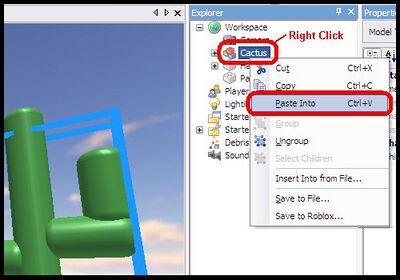
After that, you have to place the camera inside the model that you wish to upload. In my example to the left, the model I plan on uploading is called "Cactus"
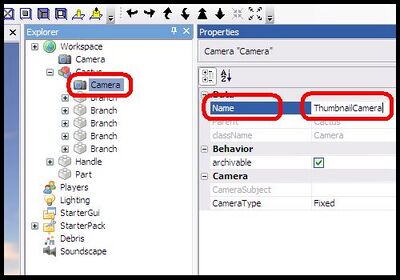
Once you have pasted the camera into the model, you have to name it "ThumbnailCamera" so that the game can recognize that you wish for it to be the model image.
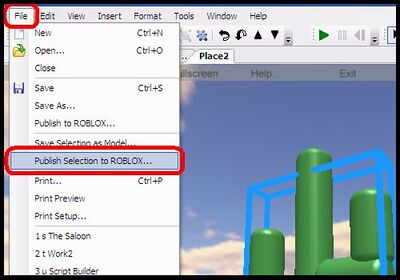
Once you have the camera in the model, you'll have to select the model and go to File > Publish Selection to ROBLOX...
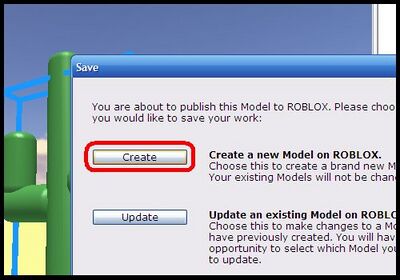
After you hit publish, you'll have to select the 'create' button. If you actually happen to be updating a model, you can hit update, but for the purposes of this tutorial, I am going to create a new model.
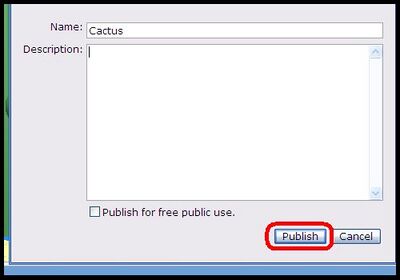
In the next window, you'll be able to name your model. Give it a name that fits it so that people who are looking for a model like yours will be able to find it. In my case, naming my model cactus would be best for me. You can choose to give your model a description. If there's anything you wish to tell your potential model users, you can use the description to do that. Finally, the check box at the bottom helps you designate whether or not people can freely take and use your model. Check it if you want to allow people to use your work. Uncheck it if you don't want people to be able to take it. After you finish everything, you may hit "Publish."
Once you do that, you are finished. You can find your model in your stuff and monitor it daily. You can see how many people favorite it, or take it. Hopefully setting a 'pretty' thumbnail picture helped you out.