Create a Group
From Legacy Roblox Wiki
Jump to navigationJump to search
See also: Groups

|
Archived Page This article has outdated information. It is now archived, only kept for historical purposes. Generally, outdated articles write about how to use or interact with the Roblox website. The services and features as written at the time have been changed or removed by Roblox Corporation. External links may be substituted with a Wayback Machine or Roblox Forum Archive link. |
So you want your own group to command around, huh? Well then here's the guide on how to go about it.
One big box!
Creating your own group is actually a pretty simple process. Before we get going though, first you should figure a couple things out.
- Why you want to have a group. Remember that you're investing 100 Robux into the new group, so it should be something that has a good purpose to it. If you're making a group to stand around and worship pickles it may not be worth that 100 Bux. On the other hand, if you're going to have a group of crazy road hogs that raid driving maps and have fun it is probably worth it!
- How do I want people to join? This is a question that can be changed later, but to start you need to know if you want anyone to be able to join your group or just people who you allow in. Also, you may want to have only Builder's Club people in your group.
If you can answer these questions then you're ready to make your group! Open up the Create a Group page from My Roblox > Groups.
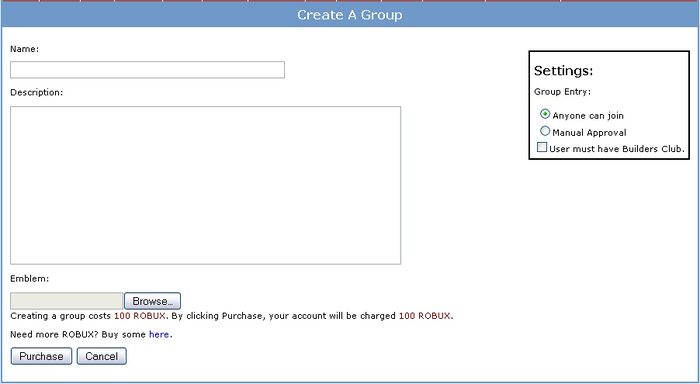
You'll get a big page that looks just like this:

That's it? Yep! That's it!
- Start with the Name of your group. Think wisely, you can't change this!
- Next comes the Description. Fill in what your group is about.
- The Emblem is the picture that represents your group.
- Don't forget the settings on the side there. You may want to change them.
Don't worry, you can change everything (except for the name) later.
Once you've filled in all the information and checked for typos hit Purchase and your group will be set up! From there you can see your Group on the Groups page.