How to Make an Office Building: Difference between revisions
From Legacy Roblox Wiki
Jump to navigationJump to search
>NXTBoy '''WHY''' was an imagemap used for a simple image? |
>NXTBoy →Building the building: {{keypress|...}} |
||
| (12 intermediate revisions by 3 users not shown) | |||
| Line 1: | Line 1: | ||
{{CatUp|Tutorials}} | {{CatUp|Tutorials}} | ||
==Overview== | |||
In this building tutorial we will use keyboard shortcuts to make building in Roblox easier and make an office building very quickly in Roblox Studio with a simple repetitive object. | |||
[[ | == Building the building == | ||
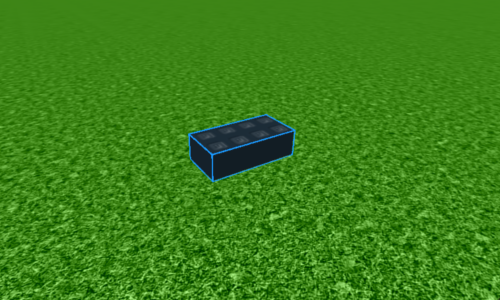
# Find a nice empty space to build and insert a single brick into your level. Use the Insert Menu. | |||
#:[[Image:OfficeBuildingShot1.png]] | |||
#Deciding what the repeatable element should look like is the trick. You have to imagine what the element will look like when it is copied and placed next to itself. In this tutorial, I have done the thinking for you, so make this L-shaped window pane. The exact size does not matter. Create the glass by clicking the brick, then going through the settings until you find [[Transparency (Property)|"Transparency"]]. Change that to 0.4 or experiment to find the right one for you. | |||
#Using the [[Drag | Arrow Tool]] to select the repeatable element. The best way to do this is to click with the arrow and drag a rectangle over all the parts. You should see them selected like in the picture. | |||
#:[[Image:OfficeBuildingShot2.png]] | |||
#Copy the selected elements by pressing {{key press|Ctrl|C}} on your keyboard, at the same time. That copies the parts. Then press {{key press|Ctrl|V}}, that pastes the parts. Move the parts next to the original ones, just like in the picture (you can move a selected group of elements using either the [[Drag | Arrow Tool]] or the [[Move on Axis | Axis Tool]]). If they become unselected, don't worry, just select them again. | |||
#:[[Image:OfficeBuildingShot3.png]] | |||
#Instead of making your building one window at a time, we are going to think big. Select ''both'' windows, using the same drag to select method you used in the previous step. Now use the same keyboard shortcuts: {{key press|Ctrl|C}} to copy, and {{key press|Ctrl|V}} at the same time to paste. Line them up so you have them all in a row. | |||
#Do this until you are satisfied with the size of your wall. | |||
#:[[Image:OfficeBuildingShot4.png]] | |||
#Now copy your entire wall. Select it, then use the keyboard Copy shortcut. Paste it, then move your new wall on top of your old wall. Make it go up a few times. | |||
#The wall is looking pretty cool! Decide when your wall is tall enough. You only have one wall, but believe it or not you are almost done. | |||
#:[[Image:OfficeBuildingShot5.png]] | |||
#One wall on an office building looks just like any other. So rather than building 4 walls, we are just going to copy. Select you entire wall. Copy it. Now drag the new wall over next to the old one, and while dragging, press R to rotate it. Place the wall like in the picture. | |||
#Now do the same process again twice. If you are clever, you will see a way to get from the previous screenshot to this one. | |||
#:[[Image:OfficeBuildingShot6.png]] | |||
#You are almost done, but we need at least two more things: a roof and a door. I did something simple for both. Make a roof but putting a big brick over the top of the building. Make a door by deleting some of your windows. There are other details you could add to this building. Put some furniture or stairs inside. Add a flag to the top. Add a floor. Put some trees around it. Expert builders know that attention to detail makes a good model great. | |||
#:[[Image:OfficeBuildingShot7.png]] | |||
== | ===The finished product=== | ||
If you didn't make it correctly, or you just don't want to make one, feel free to take the office building by [http://www.roblox.com/Office-Building-item?id=42849911 clicking here]. | |||
==Suggestions== | |||
Sure, we created an office building, but we're not over. You lead the way! The office building needs expansion. Add furniture! These simple tasks could really impact the feeling of the building. You might want to add stairwells, maybe some scenary around the building. Perhaps some trees, maybe a road. It's up to you! Have fun with your building. | |||
[[Category:Building Tutorials]] | [[Category:Building Tutorials]] | ||
Latest revision as of 16:19, 23 December 2011
Overview
In this building tutorial we will use keyboard shortcuts to make building in Roblox easier and make an office building very quickly in Roblox Studio with a simple repetitive object.
Building the building
- Find a nice empty space to build and insert a single brick into your level. Use the Insert Menu.
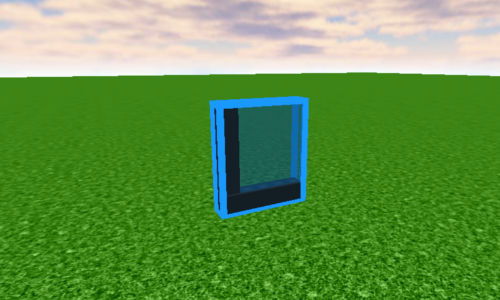
- Deciding what the repeatable element should look like is the trick. You have to imagine what the element will look like when it is copied and placed next to itself. In this tutorial, I have done the thinking for you, so make this L-shaped window pane. The exact size does not matter. Create the glass by clicking the brick, then going through the settings until you find "Transparency". Change that to 0.4 or experiment to find the right one for you.
- Using the Arrow Tool to select the repeatable element. The best way to do this is to click with the arrow and drag a rectangle over all the parts. You should see them selected like in the picture.
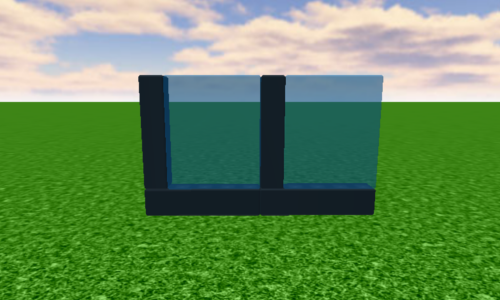
- Copy the selected elements by pressing Ctrl+C on your keyboard, at the same time. That copies the parts. Then press Ctrl+V, that pastes the parts. Move the parts next to the original ones, just like in the picture (you can move a selected group of elements using either the Arrow Tool or the Axis Tool). If they become unselected, don't worry, just select them again.
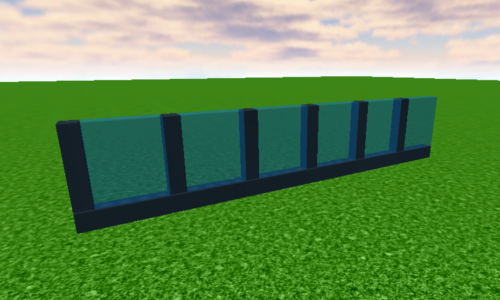
- Instead of making your building one window at a time, we are going to think big. Select both windows, using the same drag to select method you used in the previous step. Now use the same keyboard shortcuts: Ctrl+C to copy, and Ctrl+V at the same time to paste. Line them up so you have them all in a row.
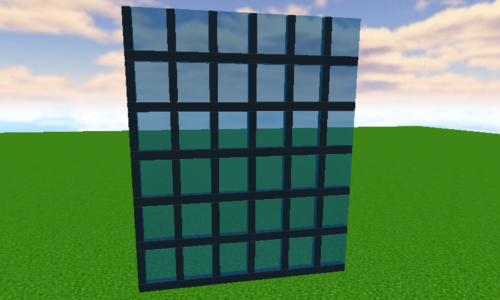
- Do this until you are satisfied with the size of your wall.
- Now copy your entire wall. Select it, then use the keyboard Copy shortcut. Paste it, then move your new wall on top of your old wall. Make it go up a few times.
- The wall is looking pretty cool! Decide when your wall is tall enough. You only have one wall, but believe it or not you are almost done.
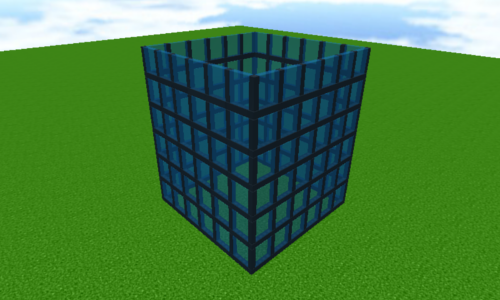
- One wall on an office building looks just like any other. So rather than building 4 walls, we are just going to copy. Select you entire wall. Copy it. Now drag the new wall over next to the old one, and while dragging, press R to rotate it. Place the wall like in the picture.
- Now do the same process again twice. If you are clever, you will see a way to get from the previous screenshot to this one.
- You are almost done, but we need at least two more things: a roof and a door. I did something simple for both. Make a roof but putting a big brick over the top of the building. Make a door by deleting some of your windows. There are other details you could add to this building. Put some furniture or stairs inside. Add a flag to the top. Add a floor. Put some trees around it. Expert builders know that attention to detail makes a good model great.
The finished product
If you didn't make it correctly, or you just don't want to make one, feel free to take the office building by clicking here.
Suggestions
Sure, we created an office building, but we're not over. You lead the way! The office building needs expansion. Add furniture! These simple tasks could really impact the feeling of the building. You might want to add stairwells, maybe some scenary around the building. Perhaps some trees, maybe a road. It's up to you! Have fun with your building.
