How To Create Models: Difference between revisions
From Legacy Roblox Wiki
Jump to navigationJump to search
>Outofspace General containers of objects. |
No edit summary |
||
| (13 intermediate revisions by 7 users not shown) | |||
| Line 1: | Line 1: | ||
{{CatUp|Tutorials}} | {{CatUp|Tutorials}} | ||
{{Archived}} | |||
Models are groups of bricks that are kept together as a set. They can be anything from small houses to entire trains, planes, cars, even complete maps, like cities or mountains! There are over a million models to pick through, see if you can find something cool through the [[toolbox]]. | |||
== | ==Making your own models== | ||
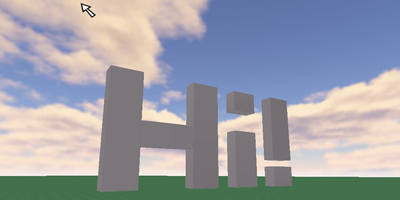
[[Image:Models tutorial 1.png|400px|center|thumb|Creating your own models is pretty simple. First, build whatever you want to make into a model. Here, I build some bricks that say "Hi!"]] | |||
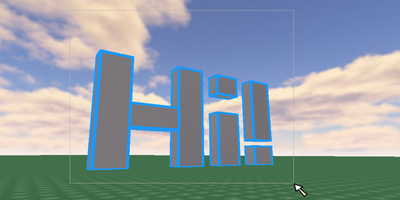
[[Image:Models tutorial 2.png|400px|center|thumb|One your model is built, drag a box around ALL of the bricks that you want to be part of the model. Make sure you have them all selected.]] | |||
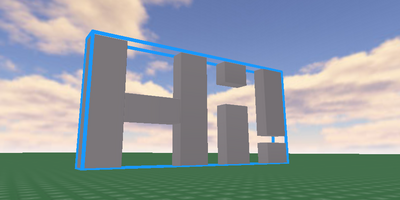
[[Image:Models tutorial 3.png|400px|center|thumb|Once you have them all selected, click the [[Studio#Group|Group]] button on the toolbar, or press the keyboard shortcut CTRL and G. A blue box will appear around the entire collection of bricks. This shows you that the bricks are now part of a model!]] | |||
[[Image:Models tutorial 4.png|400px|center|thumb|Now that you have your model created, you don't have to do anything else with it. When you click and drag any of the bricks, all the other bricks will move with it. Making models is a great way to simplify your places, as it makes them easier to build on and work with. This is really useful if you're sharing your place, that way other people can understand how you built your place.]] | |||
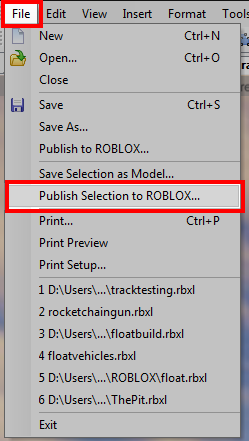
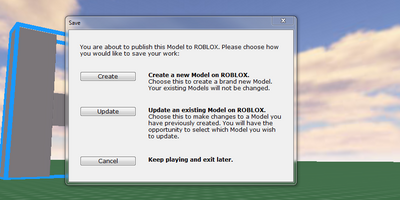
[[Image:Models tutorial 5.png|400px|center|thumb|A window will pop up asking you what you want to do. Since you want to save a new model, hit Create.]] | |||
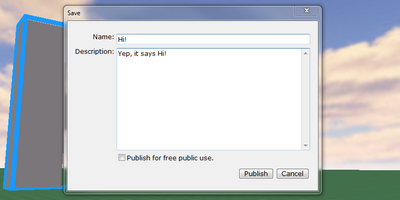
[[Image:Models tutorial 6.png|400px|center|thumb|Enter a name and a description of your model. The name should be simple, I named mine "Hi!". the description is where you can write something long about what the model is, how it works, how to use it, stuff like that. If you want people to be able to use your model, mark the checkbox named "Publish for free public use"]] | |||
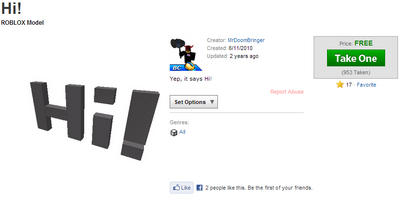
[[Image:Models tutorial 7.png|400px|center|thumb|Hit publish, and your model will appear on the Roblox website! [http://www.roblox.com/Hi-item?id=28674953 Take one for yourself!]]] | |||
== See Also == | == See Also == | ||
| Line 33: | Line 23: | ||
*[[Model]] | *[[Model]] | ||
*[[Part]] | *[[Part]] | ||
*[[Workspace | *[[RBX.lua.Workspace (Service)|Workspace]] | ||
[[Category:Tutorials]] | [[Category:Tutorials]] | ||
Latest revision as of 03:51, 12 April 2023

|
Archived Page This article has outdated information. It is now archived, only kept for historical purposes. Generally, outdated articles write about how to use or interact with the Roblox website. The services and features as written at the time have been changed or removed by Roblox Corporation. External links may be substituted with a Wayback Machine or Roblox Forum Archive link. |
Models are groups of bricks that are kept together as a set. They can be anything from small houses to entire trains, planes, cars, even complete maps, like cities or mountains! There are over a million models to pick through, see if you can find something cool through the toolbox.
Making your own models
