How to make changes to the skybox: Difference between revisions
>Flurite reworded stuff |
>Quenty No edit summary |
||
| (One intermediate revision by the same user not shown) | |||
| Line 31: | Line 31: | ||
Next, you will have to upload all your pictures to ROBLOX as a decal. Once approved, your images can be seen by the public. | Next, you will have to upload all your pictures to ROBLOX as a decal. Once approved, your images can be seen by the public. | ||
===5) Go into edit mode. === | ===5) Go into [[studio|edit mode.]] === | ||
Open up your place using ROBLOX Studio, as the following steps will all be done using Studio. | Open up your place using ROBLOX Studio, as the following steps will all be done using Studio. | ||
===6) Check too see if a skybox exists === | ===6) Check too see if a skybox exists === | ||
| Line 44: | Line 44: | ||
===10) Your image will appear<br>=== | ===10) Your image will appear<br>=== | ||
If all went correct, your image should appear as a side of the sky. If your images edges match up, then your skybox will have been completely changed. | If all went correct, your image should appear as a side of the sky. If your images edges match up, then your skybox will have been completely changed. | ||
| Line 55: | Line 53: | ||
* [[Toolbox]] | * [[Toolbox]] | ||
[[Category:Building Tutorials]] | [[Category:Building Tutorials]] [[Category:Tutorials]] | ||
Latest revision as of 01:03, 8 January 2012
Introduction
This tutorial will show you how to make a custom Skybox. Skyboxes are used as the sky and serve as a background and a great way to add new and interetsing features to your game.
Steps
1) Create a picture
Your picture(s) will need to be square unless you want your image to be distorted. The picture...
- Should not Violate the Terms of Service
- Should not be Copy Righted
- Should be fairly high resolution, but not too high or ROBLOX will decrease it's quality.
- Should (if multiple sides are used) have connecting edges.
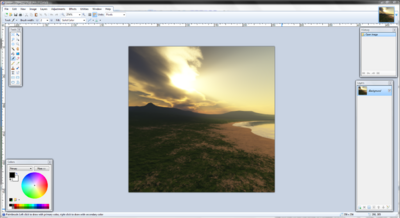
Several good programs to create a skybox in are Terragen II and paint.net. Although the rendering time in Terragen may be long, it creates outstanding terrains in all directions.

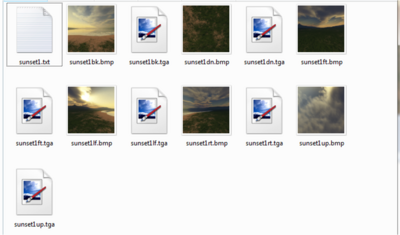
You will need 6 images. One for the top, bottom, left, right, front and back. You want to make sure the edges of the images match up.
2) Save them somewhere where you can find the image again.
Save the images where you can find them. If you created it as a paint.net file, you should save the source too, so you can edit it later. Also be sure to not mix up skybox images

3) Upload it to Roblox as a Decal.
Next, you will have to upload all your pictures to ROBLOX as a decal. Once approved, your images can be seen by the public.
5) Go into edit mode.
Open up your place using ROBLOX Studio, as the following steps will all be done using Studio.
6) Check too see if a skybox exists
Check the Lighting service in the Explorer menu to make sure that there is a SkyBox object in the service.
Click "Inventory" then click "My Decals". Your images should be there. Insert them into your game on an extra part. Once done, you can delete this extra part, as this is only used to get the ID of your textures/decals.
8) Select your decal.
Select your decal by clicking on it in the game or finding it in Explorer. You may have to click twice (double click). Look at the properties window, and find the 'Texture ID'.
9) Copy and paste the link Sky
Copy and paste the ID into the SkyBox URLs in the Properties window. Each part should corresponding (Front to front, back to back). It can be pretty confusing.
10) Your image will appear
If all went correct, your image should appear as a side of the sky. If your images edges match up, then your skybox will have been completely changed.